- Published on
Understanding Terraform Resource Blocks
- Authors

- Name
- Amit Bisht
What is it ?
In Terraform, a resource is one of the fundamental building blocks used to define components of your infrastructure. Resources represent various infrastructure objects, such as virtual machines, storage, or networking components, which are managed by providers (e.g., AWS, Google Cloud, Azure). Each resource is defined using the resource block in Terraform configuration files.
resource "<PROVIDER>_<TYPE>" "<NAME>" {
  # Configuration options
  key1 = value1
  key2 = value2
  # ...
}
- PROVIDER: The provider of the infrastructure (e.g., aws, google, azurerm).
- TYPE: The type of the resource (e.g., instance, bucket, security_group).
- NAME: A unique local identifier for the resource (used within Terraform).
How does it work ?
A resource block specifies that you intend for a specific infrastructure component to be created with the defined settings. When you're initially writing a configuration, the resources within it are only defined in code and don't yet correspond to actual infrastructure objects on the designated platform.
When Terraform provisions a new infrastructure component from a resource block, the identifier of that real object is stored in Terraform's state. This allows future updates or deletions to be applied based on changes.
For resource blocks linked to existing infrastructure in the state, Terraform checks the current configuration against the specified arguments and updates the object if necessary to ensure it aligns with the configuration.
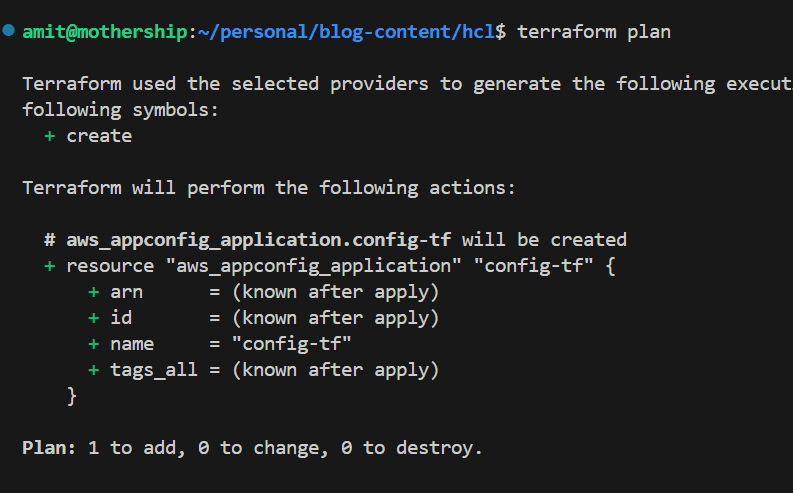
resource "aws_appconfig_application" "config-tf" {
  name        = "config-tf"
}
Meta arguments
They are special arguments that can be applied to any resource block, regardless of the provider or resource type. These arguments modify the behavior of the resources but are not specific to the resource itself.
Instead, they control aspects of how Terraform handles resources during the plan, apply, and destroy phases.
depends_on
It is used to explicitly define dependencies between resources. However, this is generally not the recommended approach. The preferred method is to utilize outputs from one resource as inputs to another, such as using an IP address or other attributes, since Terraform automatically detects dependencies. If automatic detection is not possible or sufficient, you can use depends_on to explicitly define the dependency between resources.
This ensures that a resource is created or modified only after another resource is fully created or updated
# Create an S3 Bucket
resource "aws_s3_bucket" "test_bucket" {
  bucket = "test-bucket-name"
}

# Create a Bucket Policy that depends on the S3 Bucket
resource "aws_s3_bucket_policy" "test_policy" {
  bucket = aws_s3_bucket.test_bucket.id

  policy = jsonencode({
    Version = "2012-10-17"
    Statement = [{
      Effect = "Allow"
      Principal = "*"
      Action = "s3:GetObject"
      Resource = "${aws_s3_bucket.test_bucket.arn}/*"
    }]
  })

  # Explicitly specify that the policy depends on the S3 bucket
  depends_on = [
    aws_s3_bucket.test_bucket
  ]
}
In this example, the Bucket policy needs the s3 buckets arn.
count
Allows you to create multiple instances of a resource based on the number provided.
resource "aws_appconfig_application" "config-tf" {
    count = 2
    name        = "config-tf"
    tags = {
        Name = "Config set ${count.index}" #dynamically set name
    }
}
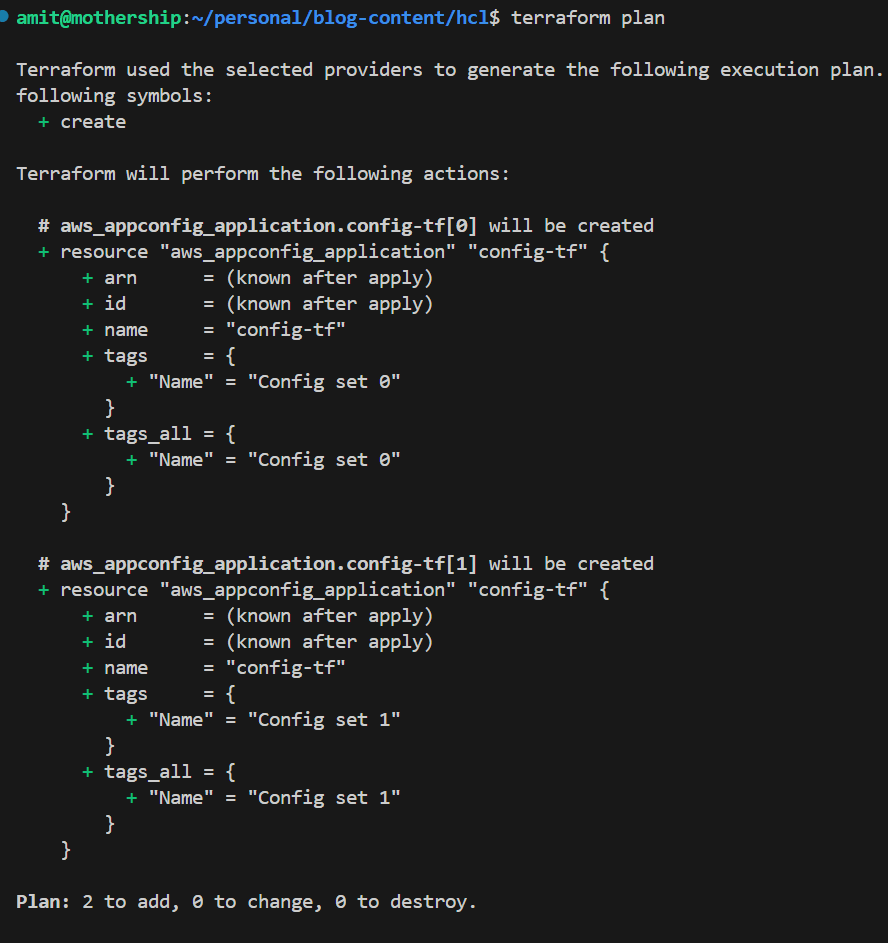
Two resources will be created.
for_each
Provides a way to iterate over a map or set and create multiple resources dynamically.
resource "aws_appconfig_application" "config-tf" {
    for_each = toset(["production", "staging"])
    name        = "config-tf"
    tags = {
        Name = "Config set ${each.key}" #dynamically set the name
    }
}
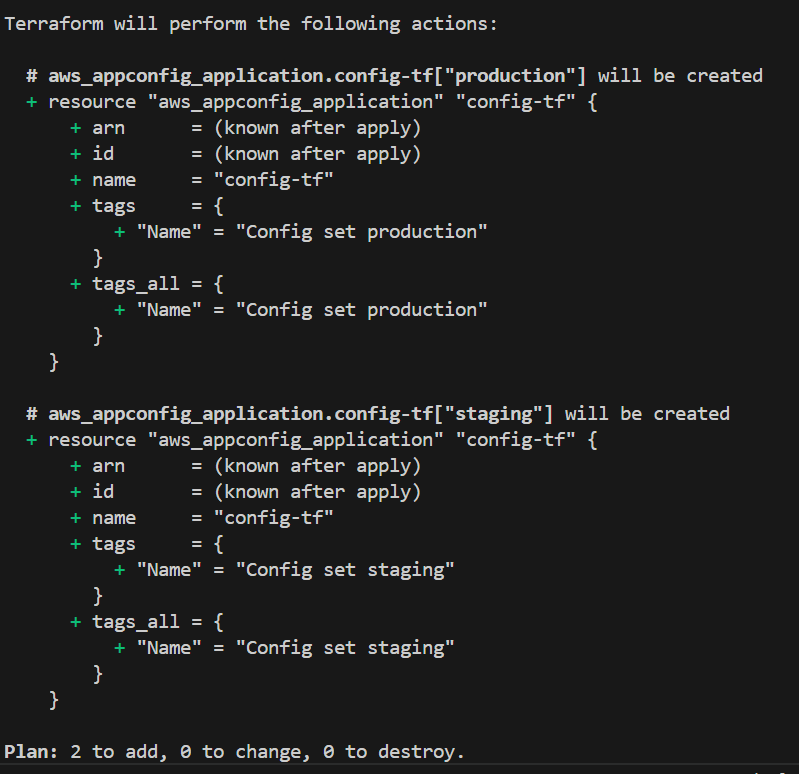
Resources created with data from list (staging, production)
provider
Allows you to specify which provider configuration to use for a resource.
provider "aws" {
  alias = "disaster_recovery"
  region = "us-east-2"
}

resource "aws_appconfig_application" "config-tf" {
    provider = aws.disaster_recovery #using specific provider with its alias
    name        = "config-tf"
}
lifecycle
A resource lifecycle refers to the set of rules and behaviors that control how a resource is created, updated, and deleted. The lifecycle of a resource can be customized using the lifecycle meta-argument, allowing you to manage how Terraform handles specific resources in different scenarios, such as ensuring zero-downtime deployments, preventing accidental deletions, or ignoring specific changes.
- create_before_destory
Ensures that a new resource is created before an existing resource is destroyed.This is useful for resources where downtime should be minimized (e.g., replacing a server or load balancer without interrupting service).
resource "aws_appconfig_application" "config-tf-1" {
   name        = "config-tf-1"
   lifecycle {
       create_before_destroy = true
   }
}
- prevent_destroy
Prevents Terraform from accidentally destroying critical resources.If this is enabled and you try to destroy the resource, Terraform will throw an error and refuse to delete it.
resource "aws_appconfig_application" "config-tf-2" {
   name        = "config-tf-2"
   lifecycle {
       prevent_destroy = true
   }
}
- ignore changes
Specifies which attributes of a resource Terraform should ignore during the update process.Useful when certain changes happen outside of Terraform’s control (e.g., manual changes in the cloud console) or for attributes that frequently change and shouldn’t trigger updates.
resource "aws_appconfig_application" "config-tf-3" {
   name        = "config-tf-3"
   lifecycle {
       ignore_changes = [ name ]
   }
}
- replace_triggered_by
Defines when a resource should be replaced (destroyed and recreated) based on changes to other resources or data sources.Helps when a change to one resource requires the recreation of another resource.
resource "aws_appconfig_application" "config-tf-5" {
   name        = "config-tf-5"
   lifecycle {
       replace_triggered_by = [ aws_appconfig_application.config-tf-1 ]
   }
}
- precondition
The precondition block in a Terraform resource's lifecycle is used to set conditions that must be true before Terraform can proceed with creating or updating the resource. It acts as a safeguard, ensuring that the infrastructure is in a valid state before any changes are made.
variable "config_name" {
   type        = string
   default = "config-tf-6"
}

resource "aws_appconfig_application" "config-tf-6" {
   name        = var.config_name
   lifecycle {
       precondition {
       condition     = length(var.config_name) > 0
       error_message = "Name cannot be empty."
       }
   }
}
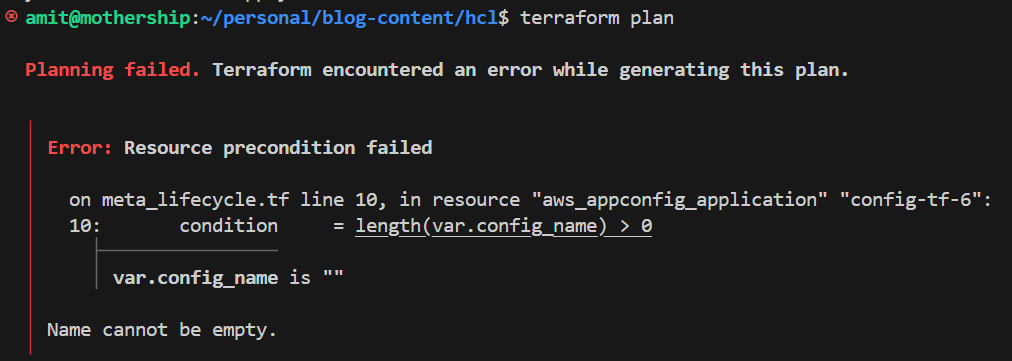
If the name is empty, an error will be triggered.
Provisioners
Provisioners in Terraform are used to execute scripts or commands on a resource after it has been created or modified. They are typically used for configuration management or to perform tasks that can't be handled directly by the resource provider, such as running scripts on virtual machines or installing software.
While provisioners can be useful, they should be used cautiously. Terraform is designed to manage infrastructure, not manage the configuration of software, so in many cases, it's better to use configuration management tools (e.g., Ansible, Chef, Puppet) or cloud-init to handle software provisioning.
Provisioners are intended for handling special or complex situations, but Terraform does not recommend using them by default.
Types
- file
The file provisioner is used to upload files or directories to the target resource.
resource "aws_instance" "example_server" {
    ami           = "ami-04e914639d0cca79a"
    instance_type = "t2.micro"

    provisioner "file" {
    source      = "conf/myapp.conf"
    destination = "/etc/myapp.conf"

        connection {
            type     = "ssh"
            user     = "root"
            password = "xyz"
            host     = "xyz"
        }
    }
}
In the provided code, the file provisioner is used to upload the local file
conf/myapp.confto the EC2 instance at/etc/myapp.conf. The connection block within the provisioner defines how Terraform connects to the instance using SSH.
- local-exec
The local-exec provisioner runs commands on the machine where Terraform is being executed (not on the remote resource).
resource "aws_instance" "example_server" {
    ami           = "ami-04e914639d0cca79a"
    instance_type = "t2.micro"

    provisioner "local-exec" {
        when    = destroy
        command = "echo ${self.private_ip} >> private_ips.txt"
        on_failure = continue
    }
}
In the provided code, an AWS EC2 instance named
example_serveruses the local-exec provisioner to execute a command on the local machine when the instance is being destroyed. The commandecho ${self.private_ip} >> private_ips.txtappends the instance's private IP address to a local file named private_ips.txt, helping to log IP addresses of terminated instances. The setting on_failure = continue ensures that if the command fails, Terraform will still proceed with the destruction of the resource without halting the process.
- remote-exec
The remote-exec provisioner runs commands on the resource after it has been created. The resource must be accessible over SSH or WinRM for this to work.
resource "aws_instance" "example" {
ami           = "ami-12345678"
instance_type = "t2.micro"

provisioner "remote-exec" {
    inline = [
    "sudo apt-get update",
    "sudo apt-get install -y nginx"
    ]
    }
}
In this Terraform configuration, an AWS EC2 instance named example is defined with an Amazon Machine Image (AMI) ID of ami-12345678 and an instance type of t2.micro. The remote-exec provisioner is utilized to execute a series of commands directly on the instance after it is created. The commands specified in the inline array include updating the package manager with sudo apt-get update and installing the Nginx web server with sudo apt-get install -y nginx. This setup automates the installation of Nginx on the EC2 instance immediately after provisioning.
terraform data
The terraform_data implements the standard resource lifecycle, but does not directly take any other actions. You can use the terraform_data resource without requiring or configuring a provider.
The terraform_data resource is useful for storing values which need to follow a manage resource lifecycle, and for triggering provisioners when there is no other logical managed resource in which to place them.
Behaviour
On Creation
Provisioners run after the resource is created successfully (Default behaviour).
On Destruction
You can also run provisioners when a resource is destroyed using the when = destroy option.
provisioner "local-exec" {
    when    = "destroy"
    command = "echo 'Resource is being destroyed!'"
}
Handling Failure
By default, if a provisioner fails, Terraform marks the resource as "tainted," which means the resource will be destroyed and recreated during the next terraform apply. You can control this behavior using the on_failure setting (continue or fail).
provisioner "remote-exec" {
    inline = ["some-command"]
    on_failure = "continue" # Continue even if the command fails
}