- Published on
Creating, deploying, and utilizing a custom Python package.
- Authors

- Name
- Amit Bisht
Introduction
There are many common tasks involved in software development, such as implementing common logic or interacting with third-party APIs. These repetitive tasks can be standardized and published as a module, allowing us to assist others and enhance them through a community effort, known as open source software.
So, let's learn how to publish a modularized piece of Python code that can be used by anyone. We will explore the basic building blocks of packages, known as modules, and how to create a package and publish it to the Python Package Index (PyPI). Afterwards, we will download it and use it to complete the full cycle.
All the source code from this blog is available here.
- Modules Basics
- Package Basics
- Directory structure of a package
- Creating a basic package
- Uploading the package
- Using the installed package
- Uploading to real python package index
Modules Basics
A module is a file containing Python definitions and statements. The filename is the module name with the suffix .py appended. Within a module, the module's name (as a string) is available as the value of the global variable __ name __.
Below is a simple Python module.
st = "John Snow is my favourite"
arr = [123, 4, 56]

def printer(arg):
    print(f'arguments = {arg}')

class InitTest:
    pass
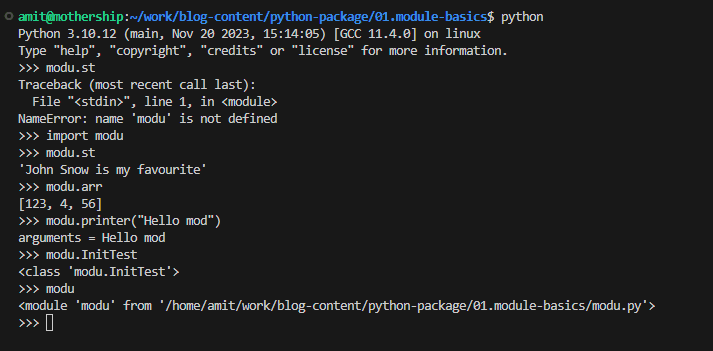
So, how do we use this module?This is a simple Python file containing variable declarations, functions, and class definitions. To test it out as a module, go into the Python command line and import 'modu'.
import modu
It does not make the content of the module directly accessible. Each module has a private symbol table, thus creating a separate namespace. So, upon importing modu, only modu is placed in the symbol table, and we can access content using dot notation.
There are multiple ways to import; some are discussed below.
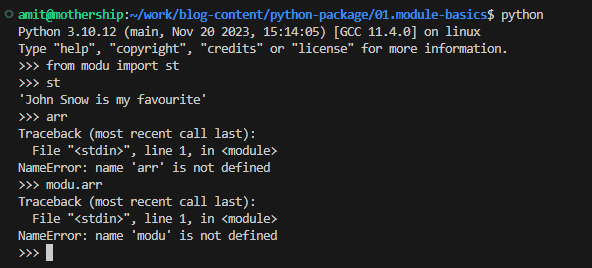
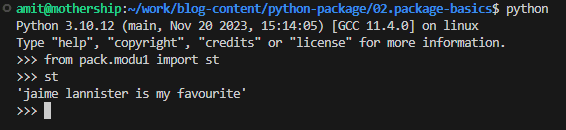
from modu import st
We can import a specific variable from the module. By directly adding st to the global symbol table, it becomes accessible without a module name. Anything else from the module is not recognized.
from modu import *
With *, we import everything from the module directly into the global symbol table.

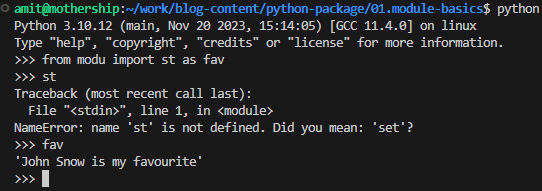
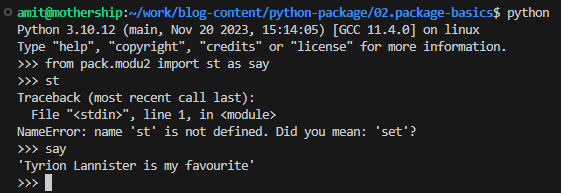
from modu import st as fav
Using as allows us to create an alias for an imported symbol to counter any potential name collisions.
Package Basics
Packages are a way of structuring Python's module namespace by using
dotted module names.
If we have a complex package with multiple features, imagine boto3 (AWS Python SDK). All its functions are created as separate modules, and all modules together create a package.
Packages allow for a hierarchical structuring of the module namespace using dot notation. In the same way that modules help avoid collisions between global variable names, packages help avoid collisions between module names.
Let's create a simple package with two modules.
st = "jaime lannister is my favourite"
arr = [123, 4, 56]

def printer(arg):
    print(f'arguments = {arg}')
st = "Tyrion Lannister is my favourite"
arr = [123, 4, 56]

def printer(arg):
    print(f'arguments = {arg}')
Both of the above files are placed in a folder called pack, thus making it a package of modules.
import pack.modu1, pack.modu2
Since a package is a hierarchical structure, we can use dot notation to import a particular module from the package and use it.
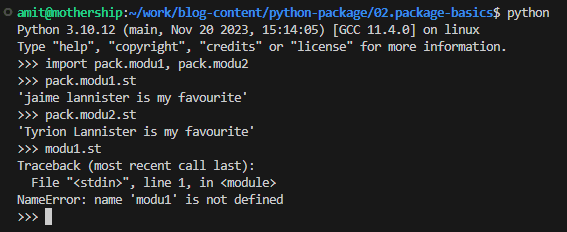
from pack.modu1 import st
We can also import a particular functionality from the package's module directly into the global symbol table.
from pack.modu2 import st as say
Importing with an alias allows us to provide a different name for a module or its components when importing them.
print(f'Initializing package name {__name__}')
greatHouses = ['stark', 'Lannister' ]
When we import the package, if this file is present, it will be invoked. This can be used for the execution of package initialization code, like this.
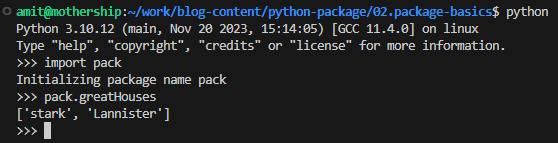
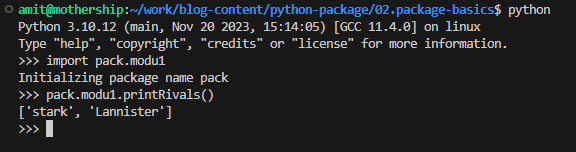
Initialized data can be further utilized in modules.
st = "jaime lannister is my favourite"
arr = [123, 4, 56]

def printer(arg):
    print(f'arguments = {arg}')

+ def printRivals():
+   from pack import greatHouses
+   print(greatHouses)
Directory structure of a package
A package does not only contain modules; it also includes documentation, licenses, unit tests, package metadata, build instructions, and more.
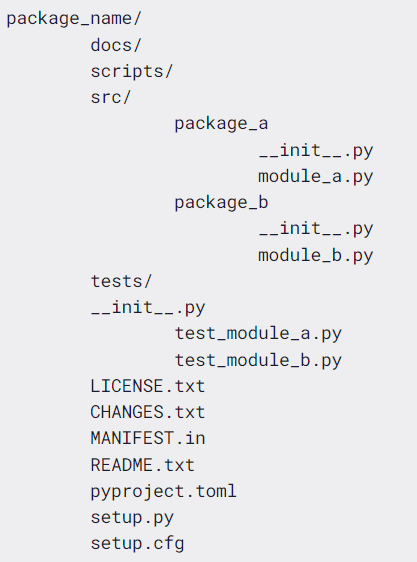
Let's understand what each file in the tree above is used for:
- package_name: Represents the main package.
- docs: It includes documentation files on how to use the package.
- scripts: Top-level scripts.
- src: Code goes here. It contains packages, modules, sub-packages, etc.
- tests: Unit tests.
- LICENSE.txt: Contains the text of the license.
- CHANGES.txt: Log the changes of each release.
- MANIFEST.in: Instructions on what extra files you want to include (non-code files).
- README.txt: Contains the package description.
- pyproject.toml: Register your build tools.
- setup.py: Contains the build script for your build tools (existence depends on build tool).
- setup.cfg: Configuration file of your build tools (existence depends on build tool).
Creating a basic package
Now that we have some knowledge about packages, let's create one.
Let's create a folder named got_spoiler containing two modules and an init file.
print("Your IP address has been sent to a white walker !!!")
import random

def can(name):
    res = bool(random.getrandbits(1))
    if res == True:
        ep = random.randrange(1,9)
        print(f"{name} is going to die in episode {ep}")
    else:
        print(f"By the grace of old gods, {name} will survive")
A module that randomly predicts whether your Game of Thrones character will die.
def season(num):
    if num >= 1 and num <= 5:
        print("Epic")
        return("Epic")
    elif num == 6:
        print("Great")
    elif num == 7:
        print("Mehh")
    elif num == 8:
        print("It does not exist")
    else:
        print("lol")
And this module reviews Game of Thrones seasons.
So, this is the core of our package. Now, we need a bunch of supporting files.
We need unit test cases.
import sys
sys.path.append(r'./src')

import unittest
from spoilers import review

class TestReview(unittest.TestCase):

	def test_review(self):
		self.assertEqual(review.season(1),"Epic")

unittest.main()
We are appending our source code path thorugh sys.path while running this test to let the interpreter know from where to import our module.
run: python tests/test_spoilers_review.py
Now, add a setup.cfg file that contains all the metadata about the package; it's pretty much self-explanatory.
[metadata]
name = got_spoiler
version = 1.0.0
author = mythLabs
author_email = amitbisht744@gmail.com
description = A simple testing package
long_description = file: README.md, LICENSE.txt
long_description_content_type = text/markdown
url = https://github.com/mythLabs
project_urls =
    Bug Tracker = https://github.com/mythLabs
    repository = https://github.com/mythLabs
classifiers =
    Programming Language :: Python :: 3
    License :: OSI Approved :: MIT License
    Operating System :: OS Independent

[options]
package_dir =
    = src
packages = find:
python_requires = >=3.6

[options.packages.find]
where = src
Now, to build this source, we will be using the Python package setuptools, and we need a file named pyproject.toml to register the build system. There are multiple other build systems like flit or poetry that we would need to manipulate just these files.
[build-system]
requires = ['setuptools>=42']
build-backend = 'setuptools.build_meta'
At last, add a README.md and LICENSE.txt.
Now, to build it, we first install the package build and then run it.
python -m pip install --upgrade build 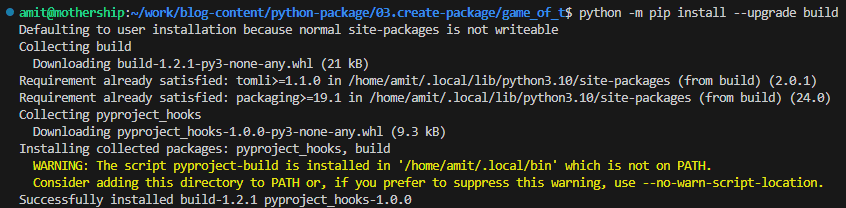
python -m build 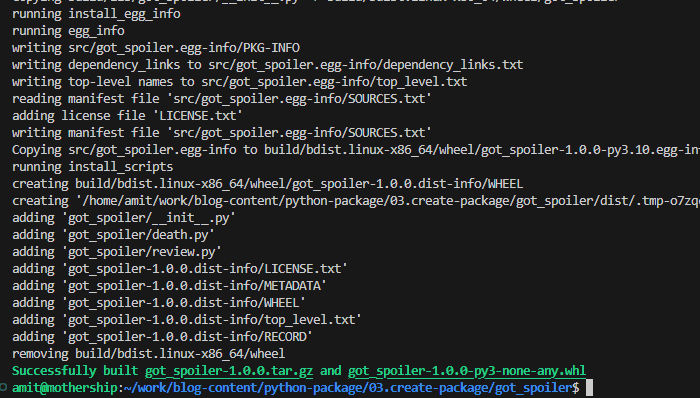
Now, we can see the distributables are generated in the /dist folder. The .tar.gz file is the source archive and the .whl file is the built archive. Both will be uploaded to the Python Package Index and installed by package installer pip.
Uploading the package
Python packages are uploaded to the Python Package Index (PyPI), but since we have to test our package, we will upload it to the test version of the Python Package Index.
First, we would need to create an account and obtain an API key to upload our package.
- Go to TestPyPI and create an account.
- Go to 'api-tokens' and create your API token to securely upload your packages.

- While creating, set the scope to 'entire account'.
- Copy the token.
Now, to upload it, we need a tool called twine; it's the official PyPI upload tool.
Now, let's go ahead and run these commands
run: python -m pip install --upgrade twine
run: python -m twine upload --repository testpypi dist/*
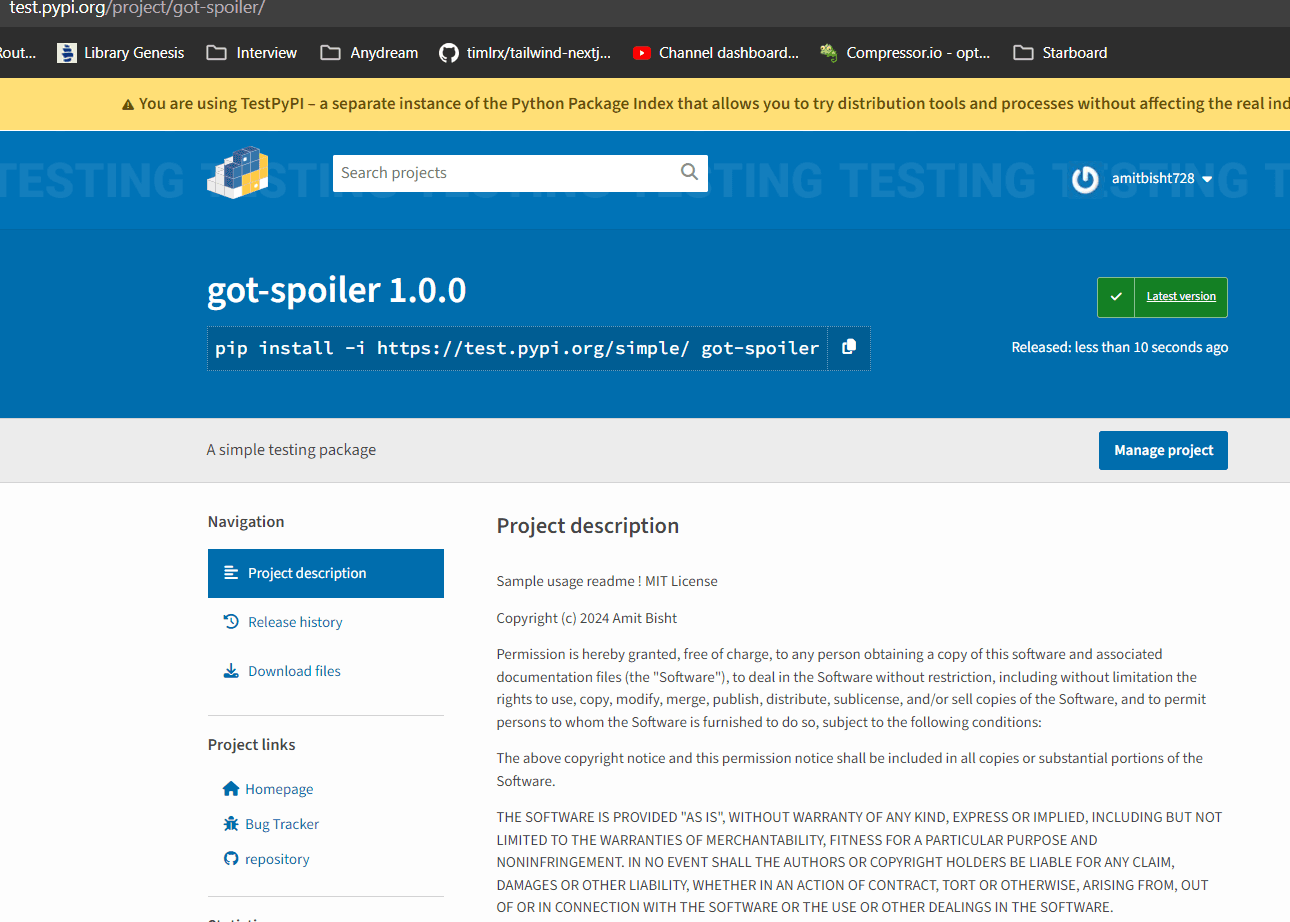
And now you can see the uploaded package on the test index.
Using the installed package
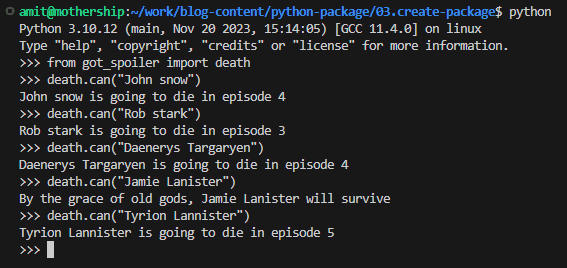
I created a file that uses our package.
from got_spoiler import death, review

print(death.can("Ned Stark"))
print(review.season(8))
So, we install the package now by running the command below:
run: pip install -i https://test.pypi.org/simple/got-spoiler

Now, we just run our 'usage.py'.
run: python usage.py

Uploading to real python package index
After the package testing is successful, we will upload it to the real index.
- Go to PyPI and create an account.
- Run
python -m twine upload dist/*in the terminal/command line; we don't need to specify the repository flag this time. - Enter the account credentials/API token you registered for on the actual PyPI.
- Then, run pip install [package_name] to install your package.